All clothes dryers have different types of filters to catch the lint generated as clothing tumbles inside the dryer, but the filters cannot catch all the lint. Some amount of lint inevitably passes into the ductwork leading to the outdoor vent, and proper maintenance requires that you clean this ductwork regularly.

Why Dryer Ducts Need to Be Cleaned
The U.S. Fire Administration reports that every year more than 2,900 home fires are started by clothes dryers, and the leading cause of these fires is a buildup of lint due to lack of simple maintenance on the part of the owner. Each load of laundry that passes through your washing machine and makes its way to your clothes dryer contains lint—mostly small particles of cloth and fiber that are loosened from clothing by the action of agitating water.
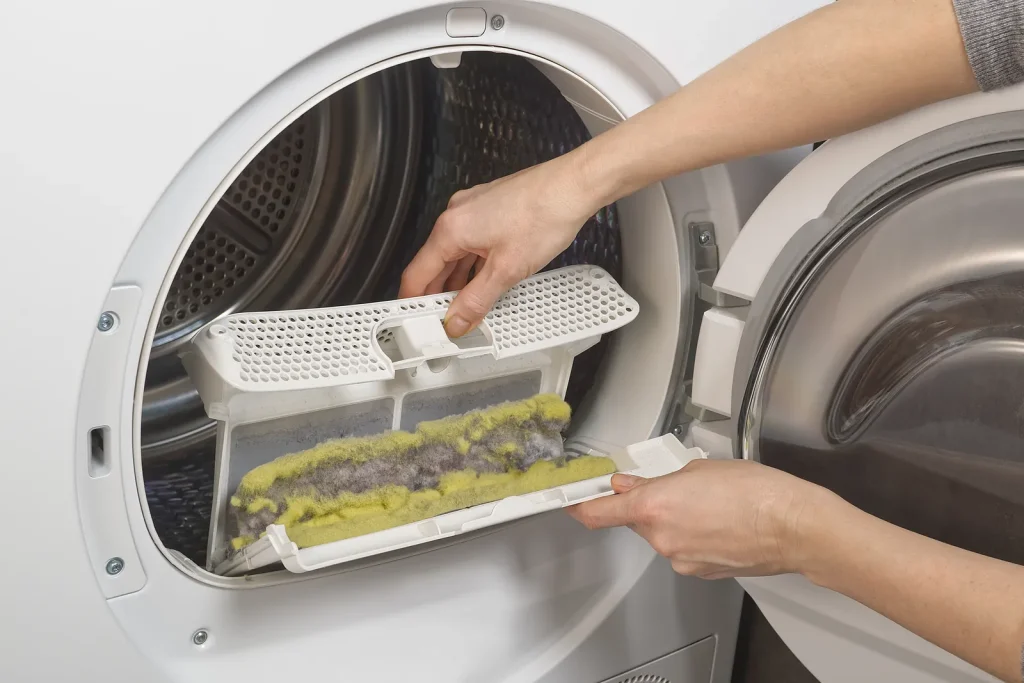
The removable lint filter in your dryer simply cannot catch all the lint freed from clothing. The lint that makes it past the filter gets trapped in crevices deep inside the lint filter trap and all along the dryer ductwork as it makes its way to the outside vent opening. When the lint builds up, they restrict airflow and lead to overheating, which can ignite the lint itself.
There are several warning signs that dangerous lint buildup has occurred in your dryer ductwork system, indicating that it needs a thorough cleaning:
- Clothes take longer to dry or don’t dry fully
- Clothes are hotter than normal at the end of the drying cycle
- Outside of dryer gets very hot
- Outside exhaust vent flapper does not open very much, indicating low exhaust velocity
- Laundry room becomes more humid than usual
- Burnt smell is evident in the laundry room

Safety Considerations Before Starting
The flexible plastic or metal foil ductwork that was once commonly used to connect dryers to outside vents are now forbidden by most local building codes. These vent tubes were popular because of the ease with which they can be routed through difficult spaces, but because their inside surfaces are ribbed, they can easily catch lint and cause fires due to overheating.
If you have one of these flexible ducts installed, it is best to replace it with smooth-walled metal ductwork approved for this use. If you can’t remove and replace the old ductwork, then it should be regularly removed and carefully cleaned out from one end to the other.
Special Brushes Are Needed
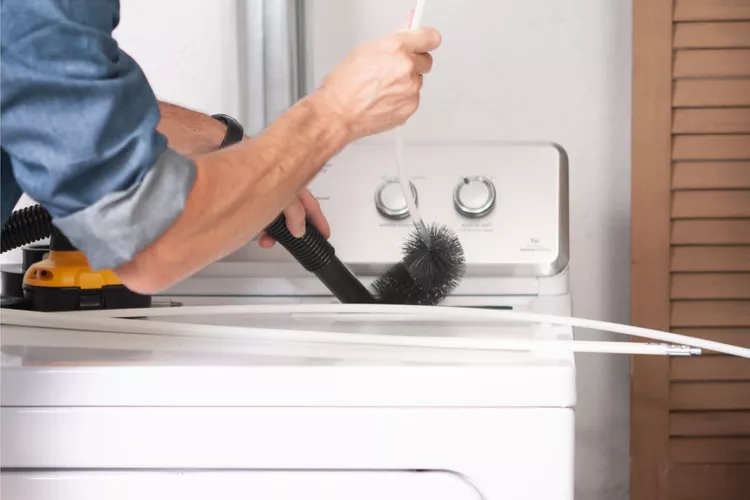
Thorough dryer vent cleaning requires special brushes. Vacuum attachments alone do not work as well because they do not agitate the lint to remove it from the walls of the duct, and they can’t reach deep enough inside the dryer’s lint filter housing.
Brush kits come with a long-bristle brush to clean the lint filter area, as well as a round-bristled brush that can clean out a 4-inch round rigid dryer duct—the kind you should have for all concealed portions of your duct run. The round brush tip fastens to a flexible fiberglass shaft that can be lengthened in sections.
Instructions
Remove the Lint Trap Filter
Remove the lint trap filter, remove any lint, and vacuum clean with your vacuum’s brush attachment.
Vacuum the Lint Trap Housing
Vacuum the inside of the lint trap housing, using a long, skinny hose attachment for your vacuum cleaner. Follow the initial vacuuming with a second pass, using the long flexible brush from the brush kit. Extend the brush all the way into the bottom of the cavity, then gently pull the brush out of the dryer housing.
Clean the brush bristles with the vacuum. Repeat as needed until there is no more lint that can be removed from the cavity.
Disconnect the Dryer Ductwork
Unplug the dryer’s power cord, and turn off the gas valve at the dryer (for gas dryers). Disconnect the duct joint closest to the dryer, then gently pull the dryer away from the wall. Disconnect the remaining exposed sections of dryer duct. If the sections are taped, remove and discard the tape.
Clean the Ductwork
Attach the round-duct brush head to the flexible fiberglass shaft, following the brush kit manufacturer’s directions. Insert the brush into each duct section and sweep it clean by using a rotating motion while moving the brush back and forth. Pull out the brush and clean the head frequently.
Clean the remainder of the duct run using the same techniques, adding more sections of the flexible shaft as needed to reach the end of the rigid duct. Repeat until no more lint comes out of the duct.
Check the vent cap at the exterior end of the duct to make sure it is clean and its flapper door works properly.
Reattach (or Replace) the Ductwork
Reassemble and/or replace the duct sections, keeping the following recommendations in mind:
- It’s best to use an adjustable, rigid, 90-degree elbow at the exhaust end of the dryer. Flexible ducts can kink when the dryer is pushed back into place, causing a major obstruction to exhaust flow.
- A section of flexible metal transition duct is acceptable between the dryer elbow and the rigid duct in the wall, provided the transition duct is UL-listed for this use and is permitted under the local building code. But do not use unlisted metal transition duct or any flexible foil or vinyl duct.
- Attach all rigid metal and semi-rigid ductwork sections with a 4-inch worm-drive stainless steel duct band clamp, tightening the clamp with a screwdriver.
- All concealed ductwork (hidden inside walls, floors, etc.) must be round, rigid metal duct. Replace any flexible duct that isn’t exposed with rigid metal ductwork.
- Seal permanent duct sections with UL-listed metal foil duct tape. Do not use regular plastic duct tape, which dries out and fails over time.
Once the ductwork is in good shape, turn on the gas valve (for gas dryers) and plug in the dryer. Push the dryer back into its normal position, making sure that none of the ductwork is kinked or deformed by this action. Make sure the lint screen is in place. Run the dryer and confirm that it is venting completely.

Thanks for the heads-up
It’s an extra step that I’ll definitely add to my routine
Safety first
Understanding the importance of cleaning dryer vent ducts is crucial for maintaining safety and efficiency in my home, ensuring that my dryer operates effectively and reduces the risk of fire hazards.
Learning about the process of cleaning dryer vent ducts provides valuable knowledge that empowers me to take proactive measures in home maintenance, safeguarding my family and property from potential dangers.
Implementing regular cleaning of dryer vent ducts not only improves appliance performance but also contributes to energy savings, making it a practical and responsible household practice for long-term benefit.
Regularly cleaning your dryer vent ducts reduces the risk of fire and improves dryer efficiency.